
How Long Do Cornstarch Nails Last? – Fully Explained
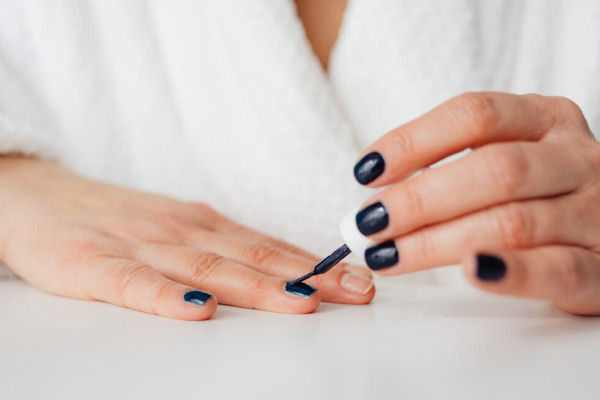
Most of us are not even conversant with cornstarch nails. It’s basically a homespun idea that involves coming up with your own matte color for your nails and applying it. This offers a protective layer for the nails and also makes them thicker. You probably won’t be surprised by the results. Besides, you have nothing to lose save for time since the ingredients are as cheap as they come. You can do the cornstarch nails during your free time or when you are looking for a fun activity to do with the girls at home.
How Durable are Cornstarch Nails?
Cornstarch nails can last up to a maximum of three weeks. This is because cornstarch nails are not meant to be a good-looking, easy and long-lasting option. For the most part, they are usually a temporary fix since they look more natural as compared to other nail enhancements like dip powder or acrylics.
How to Make a Mixture of Cornstarch Nails

Here’s a simple recipe of making a mixture of cornstarch nails. You can easily find the supplies from the dollar or drug store.
Supplies for Making Cornstarch Nails Recipe

- Something that you can use for mixing
- Q-tips with pointed ends
- Paper plate
- Nail scissors
- Nail polish – any color depending on your personal preference
- Cornstarch
- Topcoat
- Base coat
- Painter’s tape – Don’t use a duct tape as it can interfere with the end result or fail to come off
Follow These Steps to Make a Cornstarch Nail Simple Recipe:

- First, clean your nails thoroughly removing any oil and old clear polish. In this case, you can use a nail polish remover to remove the natural oils, dirt, dust and nail polish from the nails.
- Use a buffer to file and buff the nails. You can forgo this stage if you don’t have the necessary equipment for the job.
- Clip the hangnails and also clip the nails to your desired length especially if they are long or have ragged edges.
- Use the base coat to paint the first layer on your nails. Allow it to dry off completely for about 15 minutes or more depending on the humidity of the area before applying another layer. As a matter of fact, humidity plays a significant role when it comes to cornstarch nails. Just like powder or starch, cornstarch tends to clump and can fail to dry when humidity is high. In such a scenario, a blow dryer will come in handy.
- Pour a small amount of the nail polish at a time on the paper plate. If the plastic plate is disposable, the better!
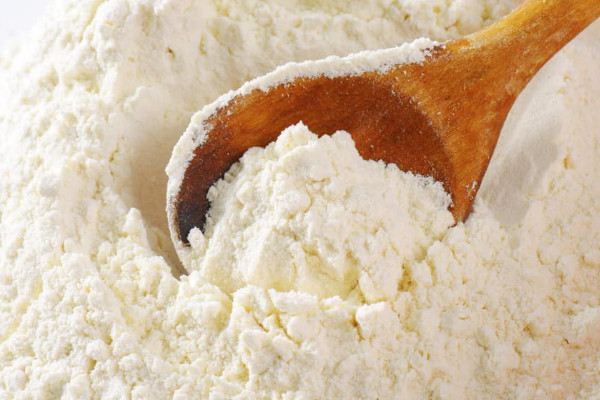
- In a ratio of 1:1 mix a part of the cornstarch and the nail polish. Remember, you can always add small amounts but taking out is impossible once you mix the two products, so be careful when doing it, starting with a part of each.
- Mix the nail polish and the cornstarch until the cornstarch’s whitish-yellow color totally disappears. If the nail polish absorbs the cornstarch too much, then you can always add some more a part at a time.
- Use the mixture before it dries up and paint a layer of cornstarch color onto the nails.
- If you are the adventurous type, use the painter’s tape about quarter an inch to cover the nails after they dry up. Put the cut strips diagonally or straight across then use a different color to paint a small part of the nail. You ought to experiment since there’s absolutely nothing to lose!
- When the paint dries up, use the topcoat to paint either two or three layers. Remember, you have to wait for one layer has to dry up completely before applying another one. Make the coat a bit thin but not too thin that the polish drags off with the cornstarch from the nails. Neither should it be too thick a it might get gummy and peel away when it dries up. You might need a little practice since this is an art on its own.
Bingo! You have your cornstarch nails!
If you are staring at something that almost resembles a painted wet sand or stone wall, well, there you go. No, that’s not an accident. It’s usually that bad. However, you can come up with a great textured design if you play with it a little. It’s only pathetic if you were looking to have a smoother finish.
Acrylic Nails with Cornstarch

You can do acrylic nails with cornstarch but not as an alternative for dip powder or acrylic. One of the most common reasons why most women opt for acrylic nails is not only to make their nails strong but also long-lasting. We cannot say the same about cornstarch nails.
If you can access a nail salon to go get your acrylic nails filled but you can’t stand your nails looking weird, the cornstarch fillers are your best bet for a week. Your nails will either melt or break if you take on any task while going about your day-to-day activities unless you sit back and relax without touching anything at your disposal.
Taking Care of Cornstarch Nails

You want long-lasting durability if the cornstarch nails or fillers worked for you. Their longevity isn’t guaranteed but there are some things you need to factor in if you want them to last longer. There are no guarantees since everything depends on the individual’s products, skills and practice when it comes to creating cornstarch nails.
- Ensure you keep your hands dry and clean for the most part of the day and night.
- Always wear gloves when cleaning.
- Wear gloves when doing any task in the house that involves using the hands.
- Use mild soap on your hands and avoid detergents at all costs on both your hands and skin.
- Always check the cornstarch regularly and re-apply some top coat from time to time as it helps keep the cornstarch in place and stuck on properly.
Do this if you want your cornstarch nails to last longer and are not just using the cornstarch to avoid the use of chemicals:
Get a decoupage mixture like Elmer’s glue clear dry – don’t use the white one with your cornstarch.
Chemicals are chemicals but the glue is a little less harsh as compared to the powder, xylene and glue combination that’s usually incorporated in gel or acrylics. If you don’t want to use any chemicals at all, you can opt for vegetable glue. Remember, you need to apply thin coats and let it dry off completely before applying another one. In this case, the glue helps make the mixture more pliable. Plus, you can form it as per your personal specifications onto the nail.
After it hardens, buff and file the nail fill or cornstarch covering to smooth it out since the glue tends to harden. Achieving a smooth finish is a near miracle with cornstarch owing to its texture. It doesn’t change much.
Filling Acrylics with Cornstarch
Filling acrylics with cornstarch is one of the easiest ways of using cornstarch. Using cornstarch on your natural nails is more complicated since there’s usually no extension or shape when the nails are in their original state. However, you need to follow a delicate shape when it comes to acrylic nails. Plus, there are tips that stand to benefit the most from the cornstarch texture especially if acrylic nails aren’t as short.
- Clean your nails thoroughly as you normally would, then dry them off completely.
- Glue your nail onto the natural one then trim it to your desired length or you can leave it as it is.
- Use the base coat to apply a thin layer on both the nail tip and your natural nail.
Follow the steps aforementioned to mix the cornstarch
You can apply a nail polish in your color of choice afterwards. However, if you go for the glue option, ensure you file and buff your nails before applying the nail polish for a smooth finish. This also helps shape the cornstarch once it hardens.
At this point, ensure you put the cornstarch on the nails in thin layers.
- Brush on some clear nail polish then let it dry off completely
- Brush on a thin coat of cornstarch then let it dry off completely
- Repeat the 1st and 2nd steps as much as you like until you achieve your desired thickness
However, don’t make the layers too thick since it might peel off, break or crack prematurely as the level of thickness can make them crumble.
Cornstarch Nails Design Ideas

You can always leverage the texture, natural composition and thickness of cornstarch nails. As earlier mentioned, cornstarch nails are usually a waste of money, time and energy unless you are looking for a temporary fix of your acrylic nails. They also come in handy for those who want a quick fix for an event. However, you can create an embossed or embedded design with cornstarch before it dries off completely especially if your nail tips are quarter an inch past the finger tips. For this procedure, you can check the instructions on the first set but avoid the glue option to keep the cornstarch more pliable.
Once you apply the first cornstarch layer wait until it dries up completely before applying another coat. The second coat should be a bit thicker than the first one then design using the methods highlighted below.
Cornstarch is usually a texture so think along the lines of applying certain things like bling, rhinestones and pieces of lace. Don’t use expensive things since they can fall off from the nails. This is not only fashionable but also fun done cheaply without compromising on effectiveness. Place your object of choice on the cornstarch while it’s still pliable then gently press it in allowing it to slowly set in irrespective of what it is.
Use a slightly thick clear nail polish layer to cover it. Air dry for about 10 to 15 minutes and set it using a blow dryer then wait until it completely dries up. Remember, cornstarch takes longer to dry and once it does, it doesn’t crumble.
You can also use a painter’s tape to come up with another design since you can effortlessly paint on different colors in different patterns. Set in any material, lace or bling on a part of the nail divided by the painter’s tape.
Does Cornstarch Go Bad on the Nail Since It’s Food?

The answer to this question is no. However, cornstarch can act as a breeding ground for fungus, mold and bacteria. Naturally, cornstarch is said to be a talc replacement which is associated with a certain type of cancer. Most people use cornstarch owing to its powerful ability to absorb moisture. The only drawback, just like anything with moisture absorption capabilities, it tends to breed fungus and mold. However, when done correctly, you won’t experience any of these fungus and mold development.