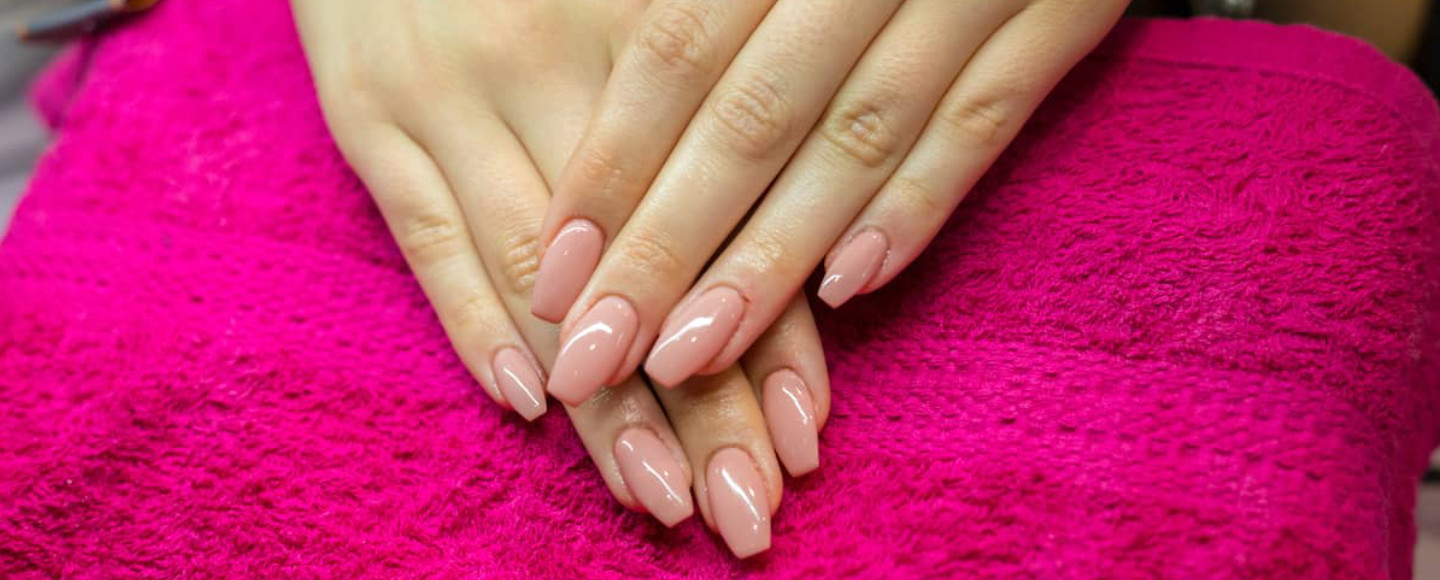
How Thick Should Gel Nails Be?
Gel nails are a popular trend among women who want to look their best. But what exactly do these artificial nails look like? Discover more about them here!
You can turn your nails to something fashionable to show your uniqueness owing to the diverse options in the nail art world. Polygel nails are the newest innovation in the nail industry. Polygel nails are sturdy like acrylics and flexible like gel nails since they are a combination of the two. You can make your nails look stunning and more natural regardless of their size.
How Thick Should Gel Nails Be?

If you are going for short polygel nails, then they should be in the size of a credit card thick. Longer polygel nails should be a little thicker to help support the weight and length of your artificial nails. The free edges should be thinner and apex thicker if the nails are longer. The tallest point at the center of the nail plate is what is referred to as the nail apex. The nail plate is usually the visible part of the nails while the free edges are parts with no skin covering.
The apex usually takes more integral stress as compared to other parts of the nail. The free edges of the polygel nails can easily snap into two with a snag if the apex isn’t thick enough. However, don’t make the apex too thick as it might end up looking like a crown. The free edges should always be about 0.3 inches or less regardless of the length of your nails.
A large apex on a short nail will make it look like an egg which is not exactly what you would want from polygel nails. Get your polygel nails done by a professional nail technician for best results especially if its your first time wearing nail enhancements. Applying polygel nails is easier as compared to acrylics and normal gel.
However, getting a perfect shape for the nails requires some professional touch ups. Those who are used to wearing artificial nails might prefer polygel nails over other nail types as they are easy to mold and are equally affordable.
There are different artificial nails on the market but all of them require special attention and care for long-lasting durability.
Applying Polygel Nails

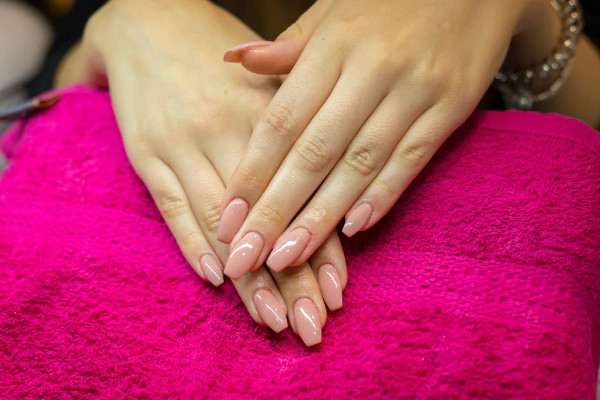
There are things you need to prepare before working on the polygel nails. You need a hand towel that is big enough to accommodate your entire hand. The towel is meant to catch dead skin and any shavings that might fall as you prepare, shape, apply the nails. Plus, it makes cleaning easier when you are done.
Bacteria can easily get under nail enhancements that’s why it’s always advisable to sanitize your fingers and wash your hands thoroughly. Plus, it helps polygel adhere better to the nails and makes them less susceptible to bacteria and infection.
After you are done with the preparations, you can move to scrapping off any dead tissues that usually tend to appear when pushing back cuticles. File the nails lightly until they lose their natural shine then apply a nail dehydrator to the nails. You can use a fragrance-free nail polish remover or rubbing alcohol as alternatives if you can’t get hold of a nail dehydrator. Remember, it’s always important to use a nail hydrator for best results.
Apply a thin layer of base coat and cure the nail for about 60 seconds under an LED or UV lamp. Take a small polygel bead from the tube the apply it on the nail.
Dip the brush in a slip solution and start brushing the polygel over your nail.
Cure your nails for 60 seconds under the UV lamp after you achieve your desired shape. You will then shape, wipe down and buff to make them even. Apply a gel coat before curing the nails again.
Using Polygel to Extend Your Nails

Some people only use nail art to make their nails look healthier and natural while others choose to be more daring and bolder. At some point, those who wore long nails were considered to have a higher social standing. Long nails require more effort to maintain in as much as they are elegant.
Cuticle and nail preparation are the same except you’ll need ten different nail forms that effortlessly fit the fingernails before working on them. A nail form is a pre-shaped extension for the nail that helps form the nail extension as it cures. Take a tiny polygel bead from the bead then apply it onto the nail form. Dip the brush in a slip solution and brush the polygel on the form. If the polygel tends to stick on the brush, then apply some more slip solution onto the nails. However, don’t use a lot of slip solution as it can interfere with the hardening and curing process especially when it floods the nail.
RECOMMENDED: How to Make Slip Solution for Nails
As you cover the nail form with polygel, ensure you spread it on the sides properly as it helps keep it strong. Press the nail onto the finger tightly once the nail form is ready. Use a wet brush to even out the underside and remove the excess gel that squeezes out from the sides. Cure the nail for 60 seconds under the UV lamp once you get the right nail shape. You can wiggle the nail form back and forth to make it loosen up if you want to remove it. If the nail is still uneven, file it down and apply the top coat then cure for another 60 seconds.
Are Polygel Nails Long Lasting?

Polygel nails can last up to a maximum of three weeks or even longer if you apply them properly. However, there are several factors that can get in the way of their durability and longevity. What you do during the preparation process is one of the most common reasons why polygel nails don’t serve you as long as they are intended to. If you don’t wash thoroughly, dry and sanitize your nails properly, you might interfere with the adhesiveness of the polygel nails.
Removing dead skin and cleaning up the cuticles can also interfere with the polygel. The polygel usually tries clinging onto the skin particles layer instead of forming a sturdy base like a nail plate. In this case, a nail dehydrator will come in handy as it helps prevent the nails from peeling off and lifting prematurely. You can also use a nail primer to create an adhesive surface for the polygel on the nail plate to extend the lifespan of the polygel nails.
Longer polygel nails may not serve you for long especially if you often use your hands a lot. Frequent friction tends to damage polygel nails especially in tasks like lifting heavy things, playing musical instruments and typing. Using harsh chemical not only weakens polygel nails but also cause them to break down and lift. Activities like gardening, cleaning and cooking often use lots of harsh chemicals that polygel nails cannot withstand.
How long your polygel nails will last before they need to be repaired or removed usually depends on their length. Try switching up nail forms for nail tips if you are looking to keep your long polygel nails stronger.
Filling In Polygel Nails Versus Removing Them

You don’t have to remove your polygel nails after any slight inconvenience like a little lifting and a minor break. Instead, make an appointment with a professional technician for a fill in. The nail technician will check out the state of both the natural and polygel nail and advise you accordingly, whether to fill in the artificial nail’s weak points or remove the entire nail. You’ll wash your hands thoroughly and dry them up completely for a fill in. Dampness can make the nails not to adhere onto the nail plate properly. Plus, it can be a breeding ground for fungal and bacterial infection.
Once you are done cleaning the nails, the technician will file your polygel. Filing helps remove the broken and weak points especially if you are not removing the entire polygel nail. The technician will then use a small polygel bead and apply it at the base, near the cuticle. The polygel bead takes on the shape of the original one that’s already done when you use a wet brush, slightly dipped in a slip solution.
Ensure you are using the right amount of slip solution on the polygel since too much can flood the polygel nails and interfere with the curing process. Plus, it makes it hard to move especially when reapplying. After getting the right shape, cure your nails under a UV lamp for 30 or more seconds. Follow all the steps you did when you applied the first set of polygel nails. Fill ins are faster compared to reapplying and removing. Plus, they are relatively cheap.
Removing Polygel Nails

It’s always advisable to seek professional services when you want to remove your polygel nails. However, getting an appointment can be tricky if you are working on borrowed time and might opt for a quick removal. Fortunately, there are many different ways to remove polygel nails. Ensure you are in a well-ventilated room with sufficient air flow when removing polygel nails. Wear a mask and glasses to protect yourself from the dust particles that are bound to form.
Filing is one of the easiest ways of removing polygel nails. Breaking through the polygel requires a nail file that falls between grades 100 to 180. Start by getting rid of the excess length the file the polygel until you can see your natural nail. Once the natural nail is revealed, file off the dead skin and excess adhesive on the nail plate until you clean it off completely. This method might be time consuming compared to others but its cost-effective. Thankfully, you can use an electric nail drill or file to speed up the process. You should however try to be gentle when using the electric nail drill in areas near the skin.
In addition, you can use nail polish remover wraps to remove polygel nails. First, cut off the excess length off the nails and file the polygel nail surface. Then open up the removal wraps on the polygel nails. For effective and fast results, ensure you seal the removal wraps tightly around your fingers. Soak the nails for 10 minutes or thereabout before taking off the removal wraps.
Lastly, scarp off the polygel using a cuticle pusher and buff the nails to remove the remaining adhesive bits.
Are Polygel Nails Better Than Acrylics?
The concerns about acrylics from both the consumers and nail technicians saw the birth of polygel nails. Nail technicians and enthusiasts are conversant with the health risks associated with wearing acrylic nails for extended periods. Acrylic nails inhibit the ability of your natural nails to grow properly and also tends to weaken the nail bed. Acrylics contain harsh chemicals like resin and formaldehyde that can cause cancer especially when you take in the fumes.
Acrylic nails pose a great danger to the wearers but also makes the nail technicians more susceptible to cancer especially those who have to handle them frequently. The risk is even higher if they have to apply and file the acrylic nails in a room that’s not well ventilated. Most people love how safe polygel nails are for both the wearer and the nail technician. Getting them done at the nail salon might be relatively expensive but their safety makes them worth every penny.
In addition, applying polygel nails at home is a lot easier as compared to acrylic nails because they can only solidify after curing. This is the best part about polygel nails since it gives you enough time to get the shape right unlike other artificial nails. For instance, acrylic nails tend to dry up faster.
It Takes Lots of Practice to Perfect the Art

Not all of us can afford the cost of visiting the nail salon to get the nails done by a professional nail technician. Don’t fret, polygel nails are one of the easiest to apply when it comes to artificial nails. However, it takes lots of practice to perfect the art that is applying polygel nails to make them look like they’ve been done by a professional. You can start by buying relatively cheap polygel kits that usually come with a number of supplies that will come in handy during the application process. If you are looking to become a professional when it comes to applying polygel nails, then the kit is a must have.
The kit might only last you a few days, but it contains everything anyone who wants to become a polygel pro needs to practice.