
How to Keep Rhinestones from Falling Off Nails
You can decorate nails in different styles as it goes beyond using nail polishes. You can adorn your nails with decals, rhinestones, charms and paint designs. Rhinestones make the nails glitz and shine especially when light hits them. Besides, you can effortlessly wear them when going to events or everyday when going about your business. However, ensuring they don’t slip away from the nails is usually a challenge. Don’t fret, it’s quite simple.
Let’s first talk about rhinestones and their staying power and other different tips about this unique bling.
How to Keep Rhinestones from Falling Off Nails

You can cure the rhinestones in gel or super glue them to prevent them from falling off the nails. There are other types of adhesives you can use save for the hot glue. You should also remember that there are methods that are more ideal. There are different ways in which you can get the rhinestones to adhere to the nails.
However, this depends on several factors including the type of your nails. Are your nails long, short, acrylics, artificial, natural or gel? There are steps you need to follow to apply the rhinestones for each of these nail types for best results.
Applying Rhinestones to Your Natural Nails and Preventing Them from Falling Off

For this method, you can use super glue and a top coat. You must first address the care and health of your nails if you are looking to apply rhinestones securely to your natural nails. To start off, inspect your natural nails. Are they healthy or brittle and thin from wearing artificial nails for way too long? If this is the case, then you must first address the issue by probably getting manicure from a professional.
Manicures usually help fortify your nails to help them adhere to something better and for longer. You can do the manicure at home if you cannot afford the services of a professional. Follow these steps:
Special Note:
Always ensure you can apply an extra top coat on your own at home even when you get a professional manicure. Otherwise, you can dig deeper into your pockets and have the nail technician apply the rhinestones for you.
Here are some simple steps to follow when doing your manicure at home:
Put a mild liquid and water in a small bowl and soak your hands until the cuticles are softer.
Use the beveled side of an orangewood stick to push back the cuticles. Be gentle when doing this.
Using a cuticle scissor, cut any dead and white cuticle skin. Clippers will come in handy if you want to remove the hangnails.
Clip the nail tips in a straight line ensuring they are not short. You should leave at least quarter an inch at the top if possible.
File the nail to your desired length as you shape it

Using nail polish strips, paint your nails. A lot of companies have them. With this method, there’s no smudging or drying time. Besides, you can use the polish strips as accents with the adornments on different fingers.
If you opt for the traditional nail polish, always ensure you use a top and base coat. This helps you form a strong foundation for when you want to apply the rhinestones.
A Step-by-Step Guide on How to Apply Rhinestones to Your Natural Nails

These are some of the tools you need:
- Top coat
- Rhinestones
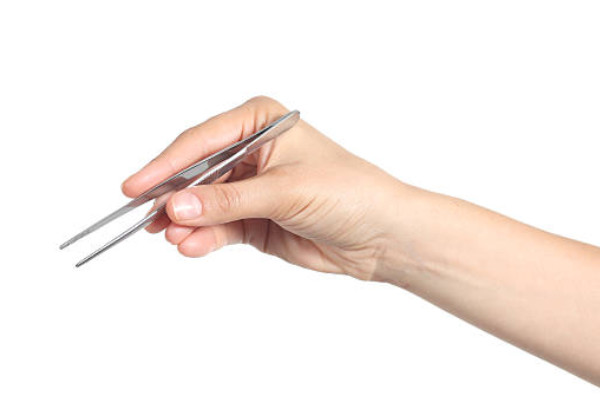
- Tweezers
- Super Glue
First Step:
Check out the rhinestones then choose the right size, shape and color as per your personal specifications depending on the finger you want to apply them on. Go through the images and videos online or look at people’s formations.
Second Step:
If you’ve did your manicure at home or done a professional one, you’ll need to apply a clear top coat in a not so thick layer. Apply a nail at a time for these reasons:
To avoid smudging other nails when working on the others giving enough time for one nail to dry as you get to the next one.
It helps ensure you get a better design and good adhesion.
Third Step:
Start with the dominant hand which means that you are going to use the non-dominant hand.
If you always use your right hand, it means that you are going to apply the rhinestones on it first.
After applying the top coat, you can use a small amount of glue on the rhinestones. For best results, put at least two coats of superglue on the rhinestones. This helps them adhere better when the coat is dry enough just like a primer.
Place the rhinestones on the nails in any form using your fingers or a tweezer. You can choose either that feels comfortable handling.
Fourth Step:
After applying the rhinestones of the first nail, apply a thick top coat on it and over the rhinestones. In this case, you don’t have to give the nails time for curing. However, you can let it dry slightly.
Repeat the above steps to apply the rhinestones on the remaining fingers.
Step Five:
Allow the nails sometime to cure. You can hold them up under the fan. Avoid using a blow dryer, LED and UV lamp unless you are applying gel. This is because excessive heat makes the rhinestones fall off from the nails.
Applying Rhinestones on Gel Polish and Preventing Them from Falling Off
Gel does amazing things to the nails. It not only strengthens them but also holds different nail decorations securely in place including rhinestones.
You can use gel nail polish with tips or over your natural nails. Follow the steps below:
Special Note:
If you got your gel done at the nail salon but still want to apply rhinestones afterwards, use a top coat if you can’t get hold of an ideal gel equipment especially when you are at home. This process is relatively expensive since it requires the use of an LED or UV lamp. If you don’t use proper tools, then the gel with not cure properly and can fall off prematurely.
A Step-by-Step Guide on How to Apply Rhinestones When Wearing Gel Nail Polish
You’ll need these tools:
- Rhinestones
- Tweezers
- Gel top coat
- Gel base coat
- Gel tips f you are going all out on the process on your own
First Step:
Follow these instructions when applying both gel and tips.
Use the LED or UV lamp to cure the nails after applying the gel. Follow these steps to the latter if you are applying gel nail polish to your natural nails. Don’t forget to apply the base coat when you are starting out and finish it up with the top coat.
Second Step:
After choosing the process you want and applying the gel base coat, use the LED or UV lamp to cure the base coat.
Apply the color of your choice then cure it in the lamp as well. You can either apply a coat or two, whichever way you prefer. However, a thicker layer would suffice since it holds the rhinestones better.
Third Step:
Apply the gel top coat. However, this time don’t cure it until you apply the rhinestone into the top coat of gel.
You can try fortifying the rhinestones with the superglue first, dealing with a nail at a time.
Unlike using the regular top coat, you can cure the nail as soon as you apply the rhinestone when it comes to the gel nail polish to make the entire process faster.
After affixing the rhinestones, use the lamp to cure them fast. You can also apply an extra gel top coat on top of the rhinestones then cure them again.
Gel nail polish hold up the rhinestones securely without compromising on the shine. This typically means that it doesn’t interfere with the sparkle of the rhinestones.
If you go with the first method which involves using a regular top coat and nail glue, then the top coat can peel off and you can also lose a little of the sparkle. This not only cause dullness but also cracks since the finish will not be smooth.
Gel comes highly recommended as compared to regular top coats.
Using Hot Glue to Prevent the Rhinestones from Falling Off the Nails

You need glue sticks and a hot glue gun to use this type of craft glue. The glue stick melts gently when you place it in the glue gun. You can use the glue gun for different types of crafts. You can also use it on a range of elements including wood and rhinestone metals.
First Step:
Put the glue gun on a surface that is heat-safe
Place a glue stick in the circular hole at the back then allow the glue gun to heat up gently.
Place the rhinestones on the table, this is after you followed the necessary step depending on the top coat you chose to apply. Since the entire process can be messy, a craft table will come in handy.
Ensure you have a scissor at your disposal to cut the glue strings that appear when you pull the glue gun from where you want to applying it.
Move quickly since the glue tends to dry up fast especially when in the air.
It’s always advisable to know the exact position you are looking to place the rhinestones before applying them on the nails.
Second Step:
Hold the tip of the gun on the nails at a precise angle ensuring the glue doesn’t glop when coming out. You want it to pour out in small amounts, not more or less.
Spiral the glue gun as you twist it when pulling away so get rid of any excess glue strings that may still be attached to it if any. You can also use the scissors to cut off the strings.
Third Step:
Put the rhinestones on the glue bead quickly then press it in gently.
If you notice that the glue is excess, it should dry and clear out without showing too much.
Once you are done with the fourth step with gel top coat over the rhinestone, then the situation should remedy.
Fourth Step:
Put the gel nail polish over your nails. You can choose to wait until you are done with all the finger nails and also applied the rhinestones. Use the LED or UV lamp to cure them all simultaneously.
Ensure you use the LED or UV lamp for curing gel since other methods can do it improperly and the rhinestones will fall off from the nails prematurely.
Picking Up Rhinestones for Your Nails

There are different ways of picking up rhinestones for the nails. One of the most common ways is using a pair of tweezers. However, it can be a bit tricky owing to these reasons:
- If you are using the non-dominant hand, then you are bound to shake and that can be awkward.
- The rhinestones can fall
- The rhinestones can shoot out especially when you hold them tightly with the tweezers.
- The rhinestones can turn over which can be a drawback since you will end up dipping the shiny side in the glue.
The above are reasons enough to explore other methods.
Picking Rhinestones Using Candle Wax Stick

A candle wax stick is not a candle holder. It’s not only an easy way of creating a rhinestone equipment but is also relatively cheap.
For this method, you’ll need a pencil or a pen that’s run out of ink or anything firm with a tip.
Light up your candle wax and let the wax melt to form a pool in your candle adjacent to the wick. Take your tip then place it in the melted wax pool.
Roll the pen, stick or pencil in the pool of melted wax to form a tiny ball of wax at the end.
Once it cools down, gently but firmly touch the rhinestones with the tip of the wax. The rhinestones should adhere perfectly well.
Place the rhinestone on the nail.
Choosing High-Quality Rhinestones

Don’t go for cheap rhinestones even if you are working on a budget. The rhinestones should retain their sparkle. Besides, you can re-use the rhinestones of they are of high-quality especially if you keep them secure.
Here’s how to choose high-quality rhinestones:
Density
The density is quite important when using chemicals and a heat lamp on the rhinestone like dip nails, polygel nails and gel nails. The melting point of rhinestones is usually up to a maximum of 140 degrees Celsius. The rhinestone acrylic type is soft and can be damaged immediately or eventually since it’s not heat resistant.
Brand
Be conversant with rhinestone brands as it will help you know its quality. It usually adheres to progression ranging from the best to the least preferred of Preziosa, Swarovski Crystal – these two are glass crystals followed by acrylic and resin.
Ideal Rhinestones for the Nails

Always go for premium quality crystal with a flat back since they are meant to sit on the nails firmly. Ensure you are conversant with what you are buying since beveled or pointed-back won’t work well. There are different terms used to describe them but always remember to go for the ones with flat backs.
The Best Glue for Sticking Rhinestones on the Nails

The rhinestones are only good if they can adhere on the nails properly. If not, they can fall off almost immediately which is frustrating since they are expensive. You also don’t want to risk damaging your manicure when the rhinestones fall off from the nails. Use a UV gel adhesive and an LED or UV lamp for curing. You can also try out the MO pretty Super Sticky Rhinestone Glue and Nail Art Rhinestone Glue.
Conclusion
The rhinestones are only as good as the adhesive.