
How To Sharpen Your Nails Into Claws (Step-By-Step Guide)
In this guide, you will learn how to sharpen your nails so as to sustain their well being and thickness whether your nails are artificial or natural.
Your nails are entirely excellent as the time, energy, and resources invested in maintaining them.
Whether you have artificial or natural nails, maintaining their health and physical appearance is an important aspect of attaining your ideal nail design.
To sustain your nail well-being and thickness, you will often have to clean them and sharpen, determined by your daily choice of activity
How To Sharpen Your Nails Into Claws

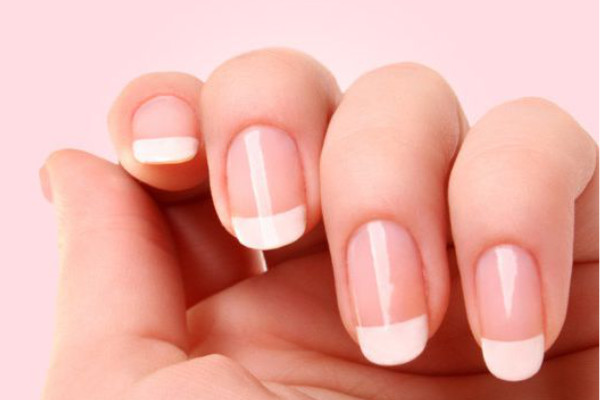
Although uttermost individuals often desire to have their nails smoothed out, several prefer their tips to gain sharper angles for a better look. Your nails can be in whatever shape you want them to be through the technology and science of artificial nails, there are seven that are more frequent than the rest , they are; Round, oval, stiletto, squoval, ballerina, almond, as well as square.
Getting on to the intricacies of these forms, it’s important to understand the fundamentals of nail sharpening. It’s not a poor decision to go over the concept once more to enhance understanding.
Step 1: Choose Your Tool

Although nail files appear to be simple and uniform, hardly any are created equal. When deciding which sorts of nail files to utilize, take into account the thickness of your nails as well as the thickness of the file
Often most of them are very coarse to enable them last longer working efficiently, but rather an overly coarse nail file will make matters worse. The rough ones are more likely to rip and damage nails rather than softly smoothing them.
Infections can result from cuts and fissures in your fingernails based on the choice of the filing tool used. Individuals might not consider it, but you should clean your nail file after each usage to curb infections. Once you file the bacteria residing beneath your nails are crushed and scattered around your file. You are more vulnerable to disease if you leave the bacterium on the file.
A glass nail file is the greatest type of file to acquire for you compared to other nail files. Nailfiles made of glass are much gentle on nails. They’re also the most simple to clean. Glass nails files are great, according to every famous nail stylist, including Sarah bland. Beyonce as a customer uses glass nail files as well.
Although the file is a fundamental tool and commonly used item in the process, it will not be the only one. Buffing blocks are equally important.
A buffing block is said to finish your nail filing process much faster and is much softer than a nail file. Buffing blocks with varying thicknesses for various tasks and nail firmness are the best when nail filing is involved.
Step 2: Prepare Your Nails
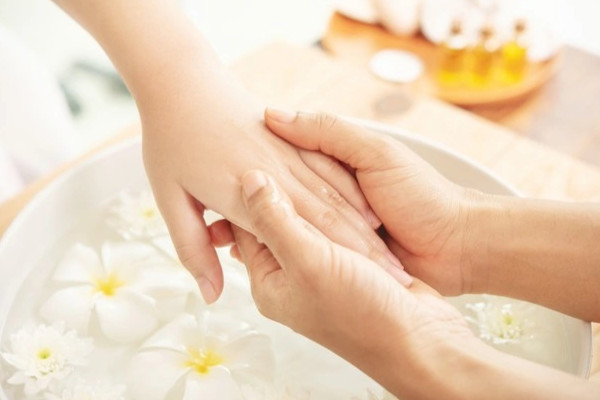
Preparation is always the key to success and fulfillment of goals, this is an adage that claims it is better to be safe than sorry, and this is no exception when it comes to your nails. Hands must be completely ashed and dried in the preparation phase. Cleaning your palms reduces the amount of bacterial on the file, which reduces the amount of bacterial, which will end up on them.
You’ll need to make sure fingers are fully dry once you have finished washing them. You’ll probably impair and break your nails if you file them when they are moist.
The most frequently overlooked procedure in filing them is washing your hands before starting the procedure of sharpening your nails.
Step 3: Filing Your Nails Properly
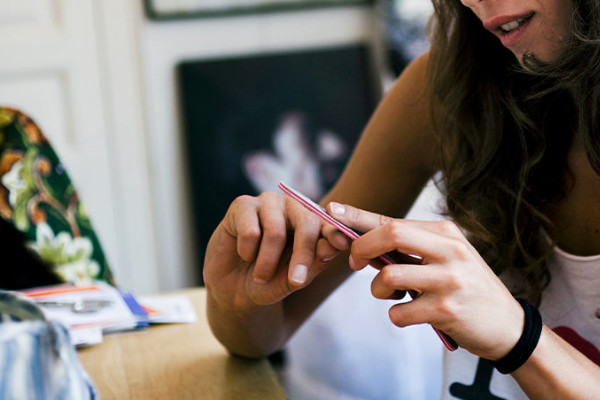
Often when various individuals file them, they are completely unconcerned as to which direction they are filing. Consider your nails to be the earth. It’s reasonable to assume that any approach of what appears to be a small, easy job could very well probably be sufficient.
There are two hemispheres on earth; the left hemisphere and the right hemispheres. Starting on one end and matching it to the second is the finest technique to file your nails
Sawing your nails alternating is also not a good idea. Instead of filing in two directions, file in one direction. The nail won’t rip or tear as a result of this sawing technique.
You will probably ruin in all the effort you put into shaping your nails if you break your nail during the filing procedure.
If you file side by side you prevent all the rips that come from sawing them
While shaping your nails, imagine yourself as a sculptor rather than a lumberjack. However, one way to improve the appearance of your filing on your fingernails is to file them like you are having someone else do it for you
To get a clear view of your nails, rest your hand straight instead of curling those inwards. It’ll take time to be accustomed to, but perfect nails come with repeated practice.
Nobody ever said being gorgeous was simple and straightforward; you will have to put together some tips to maintain a stylish look. When it comes to your nails don’t be rushed. It is far preferable to take time to ensure that your nails are smooth and even. Sloppy nail work is obvious, and no quantity of glaze can hide it. Cut once as well as measure twice just like any other kind of art.
Step 4: Buffing Is Your Best Friend

You’ll have to use the block to accomplish a better nail filing job. Buffing blocks with a variety of thicknesses are ideal for them. This prevents over buffing of your nails and harming the nail bed.
Injury of your fingernails might stifle nails development occasionally. Onsen secrets Japanese nail buffer is the greatest buffing block on the trend currently. This buffing block is paraben-free and fragrance-free making it ideal for individuals with sensitive skin on their palms.
Additionally, all of the onset items are harmless. According to most secrets, either side of the baffling block only needs to be used for 10 -15 seconds. If they are bright, smooth, and free of flakes, you now know you did an excellent job at buffing them. Buffing is the process of giving your nails a polished stylish image or shiny finish.
When Not To Completely File Your Nails

Individuals will have an easier time growing them out and a tougher difficulty time retaining them shortly. Several others, on the other hand, are known to be the complete opposite. Individuals having trouble developing their nails out or who bite their nails need not file their nails down at all.
You should always shape their edges for them to grow uniformly. To prevent filing the skin rather than your nails, you will want to file just below the nails. This also aids in the formation of a superior growing point for your nails
1. Round Shaped Nails

Your nails should be in this shape because it’s the most basic and simpler shape to attain out of the seven. Additionally, it’s also the most widely chosen by sportspeople and those involved in a lot of physical hard labor. Whether your finger is shorter, loner, thinner, or winder, this shape will perform better for you in the long run.
The above shape is most simple to clean and maintain. It’s ideal for people who have trouble growing them out or those who frequently break them thus weakening them. The look is extremely simple to maintain. Simply develop either side of them uniformly and leave a millimeter or more of the nails dangling past your fingers.
2. Oval Shaped Nails

When trying to make a round form, individuals having long fingers and fingernails can end up with the above shape by mishap. The rest of their customers will have to use this method to shape their nails.
If you grew up in the 1990s or the early 2000s, you may recall the trend of oval-shaped nails. These nails form aids in the elongation of shorter fingers, making it a great option for people with short fingers.
Start by locating the center of your fingernails to form them into an oval shape. That will be the location of the round tip of this form. You will begin filing where the snowy part of your nails begins.
You will file toward the top of the oval you’ll make from the white section of the nail base. As you begin, make sure to place your file slightly slanted higher, to start working on either of the sides. Ensure your nail’s curves aren’t over straight and overly rounded, or else you fail to create the ideal oval form you desire for yourself.
On the condition that the accomplished edges of the nails are overly straight, you should file the top of your nail to round it out. Hold off on filing the top of them till the very end to preserve as many nails in good physical condition as it is attainable on your end and to prevent by chance changing your oval nails to round nails.
Make sure your nails are equal from all perspectives by looking at them from all sides. To prevent tearing or ripping the nail, keep the pressure light. With your buffing block, you can always smooth off any rough edges on your fingernail as you wind up on the oval shape.
3. Square Shaped Nails

Whereas the round and oval nails use comparable techniques to achieve their design, the square nails demand a somewhat different method being used. Individuals with long fingers and large nails, square-shaped nails are ideal for the square-shaped nail.
A square-shaped nail is not likely to break or crack, based on the width of your nails. When you start filing them, draw a line on every nail to ensure that the quantity of extended nails on each finger is the same as all others.
Beauty experts will tend to do it with a non-poisonous, cleansable marker. When the file is flat towards the nail, hold your file vertically to your nails and file it from one side.
Ensure your file and fingers create a 90-degree point to ensure you have an equal tip of your nail. Additionally, your file ought not to be bent upwards or downwards. You’ll get a bent tip if you don’t. The edges and corners of this shape do not require any filing.
4. Squoval Shaped Nails
Begin by filing them from a square shape nail for the simplest technique to get a squoval-shaped nail.
To begin the creation of this shape, repeat the steps from the preceding shape carefully. Next, place your file underneath the flat top.
Edges of the nails should be filed out just as a smidgeon. Although the distinction with both squoval and squared nails is minor, most people believe that the above-listed nails appear stronger on a wider range of nail types and fingers.
5. Ballerina Shaped Nails

Beginning on a square -shape makes the squoval and ballerina shape easier to accomplish. After you have completed all the stages on square-shaped nails, modify the design to make a symmetrical ballerina shape nail.
Begin by curling your file below the extended nail, starting at the bottom. File it all upwards from the nail’s edge, increasing the volume once you get nearer to the top to attain your desired shape.
During the filing, use a tiny arc in your position to prevent a sharp tip. The form of your nails must ensemble that of ballerinas shoe.
6. Almond Shaped Nails

The small finger will work well with almond-shaped nails as compared to long fingernails, though the lengthy shape might be tough to achieve properly. In comparison to the rounded squoval and oval types, this shape is more prone to breaking because its breadth compromises the nail’s general coherence.
Nonetheless, when you have robust, well nails, this will not be among the main challenges for you.
Piston the file beneath your nail as you file it or into the almond form. This will aid in the creation of a more curved form required, allowing you to make an angle without having the edge excessively sharp. Polish up your nails on the ends till they approximate an almond shape
7. Stiletto Shaped Nails

The above-shaped nails are a favorite of the famous song singer Rihanna. These talon-like fingertips are just as lengthy as they are known to be sharp. Despite the fact that stilettos form is by far the most probable to deviate from the target shape, connoisseurs of the design want to be careful than thrive without them.
You should have incredibly long nails to obtain the stiletto form. You will almost certainly have the synthetic nail with adequate length to succeed in this appearance
As with other nails forms, you must curve the nail with your preferred synthetic nail. Establish the desired nail shape by laying your fingertips across anything firm. Stretch your material to a protracted point through the nail plate.
After drying all the material up file the nail straight out up to the tip of your nail bed. When filing from one path your nail file must be inclined underneath the nail, to merge the synthetic and natural nails buff the stiletto nail equally. The user does indeed have a beautiful nail shape that can be used on nails or any finger being filed.