
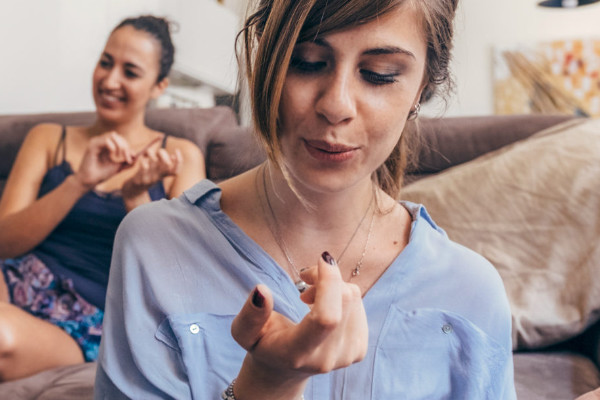
How to Remove a Broken Acrylic Nail
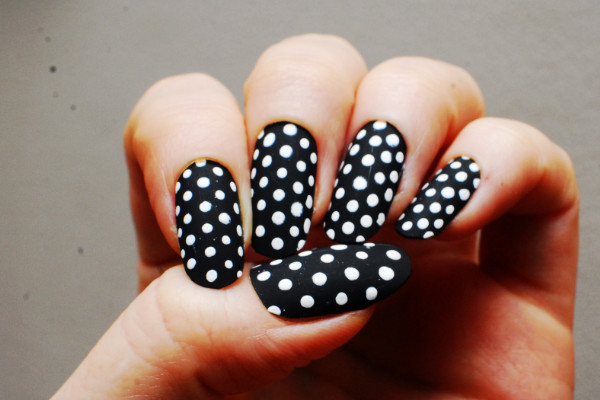
Acrylic nails are usually beautiful but delicate. Maintaining acrylic nails and preventing them from breaking as you go about your daily activities is quite difficult. Sometimes, your nails still break even when you are doing everything right. You’ll need to remove the entire acrylic nail once its broken.
How to Remove a Broken Acrylic Nail
Here’s how to remove a broken acrylic nail;

You’ll need to grab all the necessary tools before doing anything with the nails. Ensure the supplies are within reach before you begin the procedure to avoid running around the house like a headless chicken trying to find something. Today, we are removing a broken acrylic nail and not your brain.
Some of the most important tool you need to have for this procedure include a small glass bowl, a nail clipper, a nail file, hand sanitizer, soap, water, petroleum jelly and acetone. You’ll use the acetone as a nail polish remover. You can also lay off on the soap and water f you have the right type of disinfectant to clean the nails. You are good to go, if you have all these things.
First Step – Remove Any Broken Nail Pieces
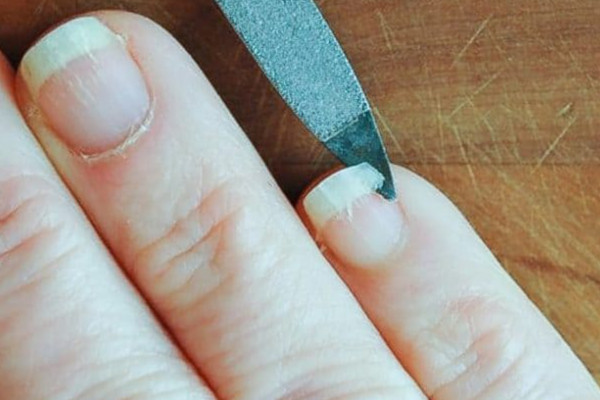
You need to start off at the exact point where the acrylic nail is broken. Break out the nail clipper and file after ensuring they are clean and properly disinfected. It’s always advisable to clean up the tools regularly as it helps prevent build up and spread of bacteria. You can begin the break up once you are certain that the tools are clean enough. Remove the broken nail pieces using the nail clipper. If the nail is too thick, then use a nail file to thin it out especially if the clipper can’t cut through it.
You can get away with only filing the acrylic nail if it’s lifted up. Keep filing the nail using a nail file until the acrylic effortlessly pops off. Avoid cutting into the nail bed and too low when using a nail clipper to prevent further damage to your already broken acrylic nail. Knowing if you have cut too deep into the nail bed is easy since it will either bleed or sting. Don’t use the nail clipper to try and tear off the broken acrylic nail as it can damage your natural nails.
Second Step – Breaking Out the Acetone
This is where the glass bowl comes to play. You’ll need to fill it up with acetone just enough to allow your fingernails to soak in comfortably. You can use petroleum jelly if your skin tends to react with acetone or other chemical compositions. Apply a thin layer of the petroleum jelly on the skin around your nails to form a protective barrier against acetone to reduce irritation.
Once you are done prepping your finger, soak it in the bowl of acetone for a few minutes. The duration of soaking the fingernail depends on the thickness of the nail. This means that the thicker the nail, the longer you need to soak it. The acetone helps eat way the nail glue while soaking to allow you remove the broken acrylic nail effortlessly.
Remember, acetone is highly flammable, so ensure you keep it away from flames. Also, for ventilation purposes, always work in a room that is well ventilated and keep the windows open. Acetone has a strong smell that usually causes migraines and headaches that’s why you might need to wear a mask during the process.
Third Step – Filing the Broken Acrylic Nail
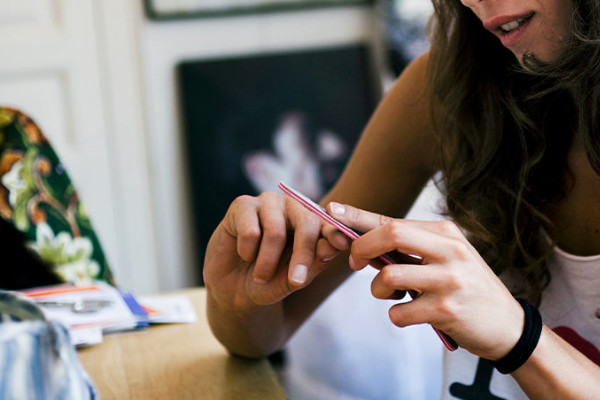
After soaking the broken acrylic nail in acetone, it tends to loosen the parts of the nail that were still clinging on the nail bed. However, it usually doesn’t remove it completely. You’ll need to smooth the nail to its original form using a nail file especially if you plan on reapplying the acrylic nail. This step is crucial as it plays a significant role in the health of your nails as it helps ensure they are properly cleaned between any acrylic applications. Remember, bacteria seeps through even on the tiniest of pores.
Use a nail file to file your nail and smooth it out completely. Be careful not to damage the nail. Wearing acrylic nails and applying nail polish constantly is usually hard on the nails. After a broken acrylic nail, the last thing you want to do is damage the nail further since you are buffing and filing too much. If you cause any further damage, give yourself a break from wearing acrylic nails and other types of nail enhancements including dip powder nails and gel.
Fortunately, you can put some hardening glosses like Sally Hansen’s Hard as Nails Clear Hardener to help the nails heal. During this time, you can try soothing out the nail edges and reshape if the need arises. When filing, always start at the base as you move towards the tip to prevent any further damage. Also, ensure you don’t over file so maintain a decent length for support when you are ready to put back your acrylic nails especially if you are planning on reapplying them afterwards.
Fourth Step – Cleaning Your Nail

You need to wash your hands properly using soap and water after the filing and soaking in acetone. In this case, a professional nail disinfectant will also come in handy. Clean your nail properly to prevent spread of infections and bacteria or development of fungus.
Failing to clean your nails properly can make you susceptible to fungus growth under the nails and on the skin around the nails. According to research, bacterial infections and fungus growth is common in those who don’t wash their hands and nails thoroughly when installing acrylic nails.
Bacterial infections mostly happens when you touch the nail bed with the acrylic nails. The infection grows between the nails and spreads though the entire finger. Fungus infections usually occurs due to build up of moisture between your natural nails and the acrylic nails. The darker, moist part between the nails sets a breeding ground that aids in growth of fungus. Cleaning the nail properly helps prevent both bacterial and fungus infections.
You can also keep your nails healthy by not wearing acrylic nails more than two months simultaneously. Also, avoid reapplying acrylic when the nail looks damaged or irritated. Wearing your natural nails from time to time will also help to prevent the spread of infections and bacteria.
Step Five – Reapplying the Acrylic Nail or Not

Here, you need to decide what to do with your nails now that’s it’s taken care of and all cleaned up. Weigh in on whether or not to apply the acrylic nail. You might probably feel weird wearing nine acrylic nails and a natural one but still need to make a decision.
If the nail is extremely damaged, then you can go natural for a while and give it some time to heal. It’s always advisable to lay off the acrylic nails for a while for the good of the nail’s health. Your nails will grow healthier especially if they are not under the stress that comes with acrylic nails, nail polish or any other type of artificial nail enhancement. Besides, you can speed up the process by applying nail hardeners or taking supplements.
In addition, you can always reapply acrylic nails without a hassle anytime if your nails are healthy. You can throw out the rest just because one broke. When you clean your nails thoroughly and properly, the risk of infection reduces and the nail can support an acrylic comfortably.
Step Six – Moisturizing the Skin
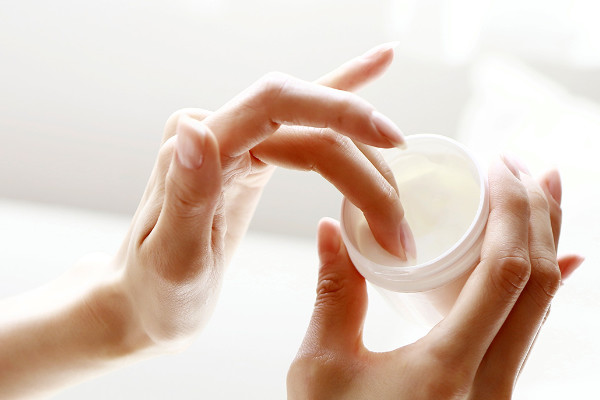
The entire process leaves you with chemicals on the skin which tends to dry you up and that’s why you need to moisturize your hands. Petroleum jelly, acetone and disinfectants usually leave the skin super dry. As we all know, dry skin is not only uncomfortable but can also result in bleeding and skin cracking.
If you plan on reapplying the acrylic nail or applying nail polish, then you’ll need to wait until the product dries up completely before moisturizing.
What Should I Do If the Nail Bleeds?
All your attention should be on healing the nail if it begins to bleed during the process. Severe damage on the nail bed tends to affect the growth of your natural nails in future. It can also damage the nail matrix – the starting point of the nail. Thankfully, there are different ways to help get the nail back to its original state. But first, stop the nail from bleeding. If you are wearing a ring or any jewelry, you might want to take them off to avoid making a mess.
Avoid touching the affected area since it can be a little painful but ensure you clean up the mess thoroughly. Continue washing it until it stops bleeding. Then use a clean dry towel to dry the affected area to prevent build up of moisture as it can be a breeding ground for infections.
To speed up the recovery process, you can apply an antibiotic cream on the injured finger. If the bleeding doesn’t stop even after washing, place a band aid around it. If all these methods fail, then you can try fixing the broken acrylic nail temporarily by:
Washing both the wound and your hands thoroughly and then look for a coffee filter or tea bag. Apply some nail glue across the broken acrylic nail. Cut a fabric piece from the teabag which you’ll use to cover the affected nail. Place the fabric on the nail ensuring it lays flat then tuck it under the broken acrylic nail using a pair of tweezers. After that, you can cover the fabric pieces with a thin layer of nail glue then let it dry.
Once the nail dries up completely, you can either file or buff it until it takes a natural shape. Apply another coat of nail hardener for protection or any other protective polish as per your personal specifications.
Preventing Acrylic Nails from Breaking

It’s always advisable to take preventative measures in any situation instead of waiting for the problem to happen. You’ll not only save money and time by choosing to be proactive about the nail damage but also save you the embarrassment that come with walking around with a missing acrylic nail. If you want perfect nails, you should always think ahead.
Most people usually prefer wearing long acrylic nails since they are alluring and fierce. However, they might not be as long-lasting owing to the type of work you subject your hands and fingers. Besides, longer acrylic nails are more prone to break.
You might want to consider getting shorter acrylic nails in the length of your natural nails if you often use your hands for heavy work like lifting bulky objects and hand washing dishes. Acrylic nails tend to grow brittle and stiffer as they get older. In this case, you can apply nail oil several times a day as it helps keep them flexible and moisturized. Every time you use the nail oil, you’ll need a few other drops for each nail. If you have to do the dishes everyday, then you can wear waterproof gloves to protect your acrylic nails and keep them safe for long-lasting durability.
Wearing waterproof gloves when doing the dishes also helps reduce the risk of moisture build up between your natural nails and the acrylics. It’s important to ensure that water doesn’t seep through the acrylic nails.
Guitarists and Manicure

Some guitarists prefer wearing acrylic nails rather than picks. Most people believe that guitarists can’t wear acrylic nails. However, acrylic nails and guitar picks are almost the same when you narrow down to the basics since they are both made of plastic. Long nails can be a hindrance when playing the guitar but the perfect length will have you throwing out all your guitar picks. The society is embracing the idea of both genders taking care of their nails which means that the trend is not new.
Bass and classical guitarists have for the longest time been receiving Guitarist’s manicure as per the guitar community. Alexander Turnquest, a multi-instrumentalist highly recommends getting short acrylic nails to strengthen the nails when strumming or plucking especially if you an instrumentalist that fingerpicks. However, most guitarists argue that using the nails to strum and pluck enables one to be more accurate and agile with the picking.
The nails are only extended to about three millimeters or even less for the Guitarist’s Manicure. Three coats of nail polish work well for guitarists since they have active fingers. You can choose the thickness of the nails depending on how thick you like the guitar picks. If your fingernails are shaped like the guitar picks, then you won’t feel any difference when using your nails.
Dealing with a Broken Acrylic Nail
Walking around with a broken acrylic nail can be painful as it is embarrassing but don’t let it ruin your entire day. You can pamper yourself and take care of your needs by taking proper care of your acrylic nails. Ensure both the nail and the nail supplies are clean for a safe experience when fixing a broken acrylic nail at home. Remember, healthy nails are more beautiful than acrylic nails.