How to Shorten Acrylic Nails (Step by Step)
Acrylic nails are quite beautiful as they make your hands look better. They are equally durable as compared to natural nails. Plus, you can decorate acrylic nails to your personal specifications and style. The best thing about these artificial nails is that you don’t have to worry about splitting, breaking or cracking unless under a lot of pressure. However, this doesn’t necessarily mean that no maintenance is required.

First, you have to do it correctly to prevent the nails from snapping. Follow the steps to the latter to safely shorten your acrylic nails to your desired length. Here’s a step-by-step guide on how to shorted acrylic nails:
1. Assess the Length of Your Nails

Assess the length you want to get rid of before shortening. Assessing the length helps you decide what exactly it is that you want to do. You can always use a nail file if you want to trim the top part only because they have overgrown and getting in the way. You need a special type of nail file for acrylics since the emery board type in the drugstore won’t cut it.
Acrylic nails are usually stronger and thicker as compared to your natural nails. This means that you’ll need proper tools, sturdy enough for the job for best results.
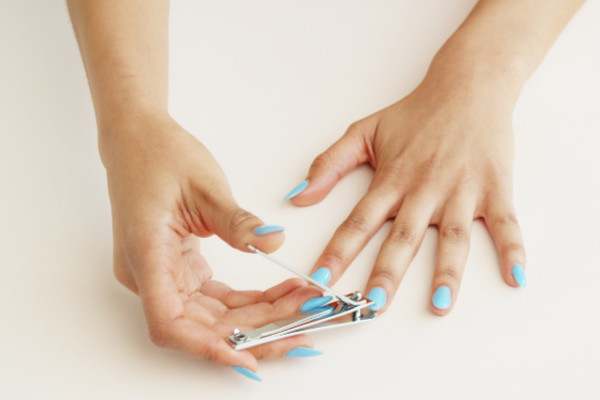
2. To Clip or File?

You’ll need a file if you want to clip your acrylic nails to your desired length. Clippers tend to leave the nail edges slightly jagged. When clipping or filing, always do it from the base going towards the tip of the nails. This helps avoid wrecking the nail’s chemistry and causing any structural issues.
When dealing with different types of artificial nails like gel and acrylics, always remember that they all have a chemical composition just like glass and wood. Nails aren’t made from these materials but might have a similar reaction under different circumstances. For instance, cutting or hammering a nail into a piece of wood the wrong way tends to split it.
Similarly, placing a hot plate on a glass makes it break or even explode in some cases. Most of us are familiar with this experience especially in the kitchen. It can be quite deceiving since it happens randomly without warning. Always clip and file your nails in tiny increments, ¼ an inch starting from the edges as you move to the center. This way, you’ll be cutting the outer edges as you draw to the middle. Clip off the point at the center.
At this point, you’ll have a semi-octagonal shape similar to that of a half stop sign. This is where the nail file comes to play. Remember to file your nails from the base while moving towards the tip. Clip and file until you achieve your designed length and shape. Focus on the dead center since it’s usually the main point of stress. For instance, you are bound to have a stress fracture if you cut off the top part at the center directly. Even worse, the nail can crumble forcing you to remove the remainder from the nail bed which is not only messy but also painful with some burning and bleeding depending on the extent of the damage.
3. What Happens If the Acrylic Nail Fails to Come Off?
You’ll notice that when you shorten your acrylic nails, the cut part doesn’t come off easily. In this case, don’t try to yank or twist it from the remaining nail using the clippers. Use your fingers to pull it gently without applying too much pressure. You’ll need to observe it closely and exercise patience. Put a band aid on that particular nail if things aren’t going smoothly. Also, ensure the sticky part doesn’t come in contact with the affected area – cut portion since you only need to hold the nail together. You’ll then need to get professional help from a nail technician as soon as possible.
Doing it forcibly will only damage the acrylic nail or cause pain and bleeding. Plus, in worse case scenarios, you might end up with a damaged nail bed leaving you with a short nail.
4. Thinning Out the Nail
After successfully going through the above steps, the next step is thinning out the nail. Once you shorten your acrylic nails, it’s usually slightly thick. You’ll need a nail file or a Dremel-type grinder to thin out the nail. This needs lots of effort and time if you are down. If not, get help from a professional nail technician. Don’t use any tool that you normally wouldn’t if you are doing it yourself at home. In other words, don’t use any tool that isn’t designed for nails.
Rotary tools designed for different purposes can result in injuries and infections. These tools tend to heat up that’s why some nail technicians usually burn you on occasions or slip and end up catching the side of your fingers. Seek professional help if you are not proficient. Ensure you evenly file or grind your acrylic nails from the base to the tip. This means doing it slowly with longer strokes from the surface going up. Avoid doing it wildly from side to side or up to down regardless of what you often see the nail technician do.
Smooth strokes help prevent uneven bumps and pits on the surface of the nails once you are done. This is quite noticeable after painting your nails.
5. More Filing and Shaping

You need to file and shape your nails again to get rid of the jagged tips and edges especially after grinding. Use the same steps mentioned above for filing. Ensure you shape the nails after filing from the base to the tip. Avoid doing it the other way round – from the tip to the base.
You can also level your nails by moving across or creating a squoval shape. You can also do different shapes including square and blunt shapes.
Stilettos are the easiest shape to do especially if you didn’t clip off the edges and left it a little pointed. If you clipped off the tips, you can file the nails to your desired shape and length. If the area around your cuticles and nails with the half-moon like shape is oval or round then this style suits you best.
The same theory applies to other nail shapes as well. Even if you are going for a crazy style, the idea is to make your acrylic nails look as natural as possible.
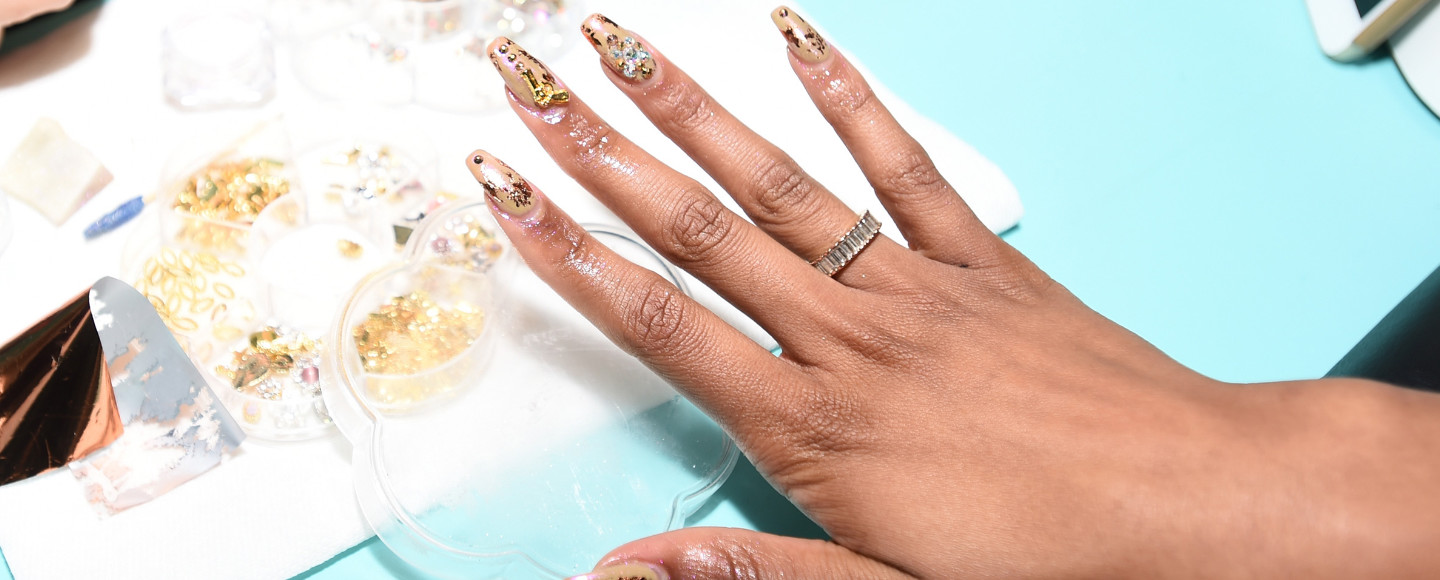
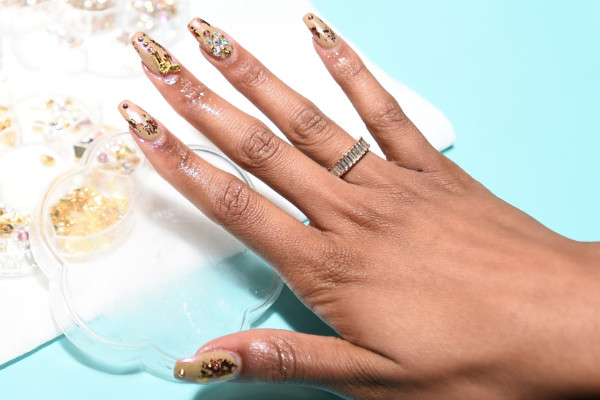
6. Polish and Clean

The next step is cleaning and polishing your acrylic nails. It’s important do it exactly how it’s done in salons. Save for the polish, you’ll also need olive oil that can act as a professional grade cuticle oil, a nail brush, top coat and base. Always remember the importance of following all these steps.
The idea here is to remove all the dust from filing and other tiny nail bits and debris that stuck on the nails. Condition the top of your nails and cuticles with oil. You don’t need a lot, just enough to absorb the dust so that you can wash it all off. Use soap and lukewarm water to wash your hands squeaky clean. Ensure you rinse you hands well and repeat a few times to be sure.
Asses your hands after drying them completely. Use a blow dryer if possible. Prepare the nails for the base coat once you are done cleaning and drying. Use an orange stick to push back the cuticles carefully starting from the base moving towards the tip with the initial base coat. The product should be thin and the strokes long enough. Allow the base to dry completely before applying another coat. Always let one coat dry before applying another one.
Apply a nail color of your choice. Starting off with a thin coat while the next coats should be slightly thicker as compared to the first. It’s also important to ensure that your color of choice isn’t gloppy which typically means too old that the end result won’t look too nice.
The first coat should always be thin. Don’t use the polish if it tends to drag off the brush. Acrylics can streak owing to the smooth plastic that’s why it’s always advisable to use a new polish or one that you haven’t kept in the heat. Then apply three layers of top coat. As usual, start off with a thin layer and slightly thick for the next two coats. Again, let one coat dry completely before applying another one. In this case, you can use a blow dryer to help dry the top coat.
After you are done, let the polish dry completely naturally for about one and a half hours. At this point, avoid opening anything with your fingers or even touching water.
How to Dry you Acrylic Nails Faster

Put your fingers in ice water for about three seconds then pull them out quickly. Don’t wipe or rub your nails, instead let them drip dry on a piece of cloth or towel. You can alternatively use a source of heat such as a blow dryer or a sealing chemical in either liquid or spray – ensure it’s professional.
How Do I Make My Nail Polish Last Longer?

There’s a lot of work that goes into getting the acrylics done especially when you do it on your own it’s no wonder that this is the most frequently asked question. Thinks of the effort used to clip and polish the acrylic nails. So, how do you make your nail polish last longer? For the most part, what makes the polish last longer is what you do to the nails before polishing. What you do with your hands also plays a significant part in this whole situation.
Remember, you cannot use acrylic nails as openers and expect the to last. Neither can you use them as an army knife. Camping knifes usually feature a corkscrew, spoon and a variety of other different tools attached. Make use of those! Most people usually overestimate the strength and sturdiness of acrylic nails and use them for crazy things like opening cans among others. This will do you more harm than good and can cause pain and injuries in the long run.
There are a few preparation steps that you need to follow before applying polish on your nails. When shopping for the best nail polish, it’s always advisable to go for a conditioning one. Don’t go beyond your budget but you should know that cheap nail polishes usually contain equally cheap chemical compositions. This is typically a case where you get exactly what you pay for.
You can order nail polish strips online since they are pure nail polish. The best part about these strips is that they don’t require any drying time and are equally easy to apply since it only takes a few minutes. You can check out some YouTube videos on how to apply them. What’s more, the instructions are straightforward and simple.
Nail polish strips protect acrylic nails and can stay on for months on end without chipping. They are also available in gel. Ensure you don’t neglect the cuticles. Most people usually neglect manicure habits after getting acrylics since they believe cuticles are not involved when it comes to preserving the acrylic nails. They couldn’t be more wrong because cuticles do more than just protecting your acrylic nails.
Cuticles play a significant role in supporting your natural nails. Your acrylics need a firmer foundation to serve their purpose.
Don’t Soak Your Acrylic Nails

This is something most people with acrylic nails usually take for granted. Acrylics are made of plastic but other chemicals and acrylic powder tend to degrade overtime. Water flows on the less resistant parts and will find the tiniest of pores under the acrylic nails that it can flow under. Wear gloves when doing the dishes since the nails can start lifting when soaked in water. Besides, moisture can also lead to growth of fungus.
Are Acrylic Nails the Best Option?

There are different types of artificial nails in the market which means you have a variety to choose from. So, ask yourself if acrylics are the best suited for you. You can get a softer alternative with little to no maintenance. Gels are made with less destructive chemicals and also last longer. You can have a more natural process done if your nails often tend to peel or break.
Silk wraps are typically your natural nails in silk wrapping. Usually, a hardener is put on your natural nails then you can paint them. However, they’ll still need some maintenance but less than what you need to do with acrylic nails. Silk wraps are easy to install and shape without having to worry about shattering them or rushing to the salon for repairs since you can effortlessly do it at yourself at home. Plus, they make your nails look more natural as compared to other artificial nails.
The silk is natural but you’ll still need a hardener to build and shape the nail to your nail. Don’t worry, you nails will breathe. However, you can suffer fungus even with silk wraps but it’s not common especially if you follow the preventive steps recommended above for acrylics.
Conclusion
Maintenance is the same for all types of artificial nails. The idea is that your natural nails are covered with something that’s unnatural. However, some artificial nails are usually less invasive hence require less maintenance. We use our hands a lot while going about our daily activities and this means that the nails are bound to suffer inevitable abuse at some point.
Artificial nails especially acrylics aren’t as convenient as most people are made to believe. Don’t get acrylics for convenience, only wear them if you want stronger nails. Acrylic nails make your hands look better and well-manicured.